Excel - Display an image in a worksheet
The advantage of the below methods is that the image displayed is not fixed (in a resized cell), allowing you to position or move the field at will. Two different approaches will be depicted in this tip:
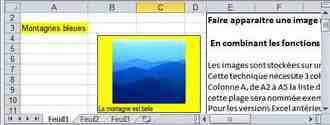
Combining the VLOOKUP and INDIRECT functions
The images are stored on a sheet in the workbook, for example on the sheet named "Sheet2"
This technique requires three columns, for example:
Column A , from A2 to A5, the names of pictures (the value that will be used as trigger), this range will be named, for example Imag. For versions prior to Excel 2007, Insert/Name/Define or, since version 2007 Formula tab/Define a name (directly into the address bar). This naamed range will provide data to a validation list.
, from A2 to A5, the names of pictures (the value that will be used as trigger), this range will be named, for example Imag. For versions prior to Excel 2007, Insert/Name/Define or, since version 2007 Formula tab/Define a name (directly into the address bar). This naamed range will provide data to a validation list. Column B , enter in each cell, the address of the cell where the corresponding photo is stored (sheet name and cell address).
, enter in each cell, the address of the cell where the corresponding photo is stored (sheet name and cell address). Column C , the cells will be resized to store the pictures. Insert each photo in a separate cell.
, the cells will be resized to store the pictures. Insert each photo in a separate cell. On the sheet named "Sheet1" create a validation list, e.g in cell A3, click on Insert/Name/Define or Data/ Data Validation tab.
This validation list can be replaced by a formula to define the mean or sort items.. The result ... would call the related image file.
Excel 2007 and 2010
Create a field
Use the Formula tab/ Define a name for the field (in our case "Photo") and in "refers to: ", paste this formula: =INDIRECT(VLOOKUP(Sheet1!$A$3,Sheet2!$A$2:$B$5,2,0))
You need to activate the camera feature of Excel:
Click the Office button.
Click on the "Excel Options".
Select the "Customize" menu.
In the " Choose commands in the following categories :" menu and select " Commands not present in the Ribbon ".
:" menu and select " ". Search for "Camera" from the dropdown menu and select the line
Click on "Add" button appears in the right column
Click on OK
The camera is now available from the Quick Access toolbar.
Activate a cell in Sheet2 (one containing a photo)
Click on the camera icon on the Quick Access toolbar
Back to Sheet1 and draw the field that will display photos
Without disabling the field, in the formula bar enter =Photo (the name that was given to the field).
Excel 2003 and earlier
You may proceed in the same way, or simply copy/paste a photo from Sheet2 to sheet1 to create a field, while the photo is active (Insert/Name/Define) give a name to field (here named "Photo") and in the "refers to" field paste this formula:
=INDIRECT(VLOOKUP(Sheet1!$A$3,Sheet2!$A$2:$B$5,2,0))
In the formula bar refer to the following field: =Photo
Save the file.
Using the OFFSET function
Let us make use of the above example: In Sheet2, column A, from A2 to A5 are the names of pictures. The range is named Imag and it will provide data to a validation list.
In this example, column B is unnecessary and you can removed it.
Create a new field that will be called "Photo_Bis" to avoid any interference with the previously named field in the first example.
Excel 2007 and 2010
Create a field:
Via the Formula tab > Define name and give a name to the field (in our case "Photo") and in "refers to" field paste this formula:
=OFFSET(Sheet2!$C$2,MATCH(Sheet3!$A$4,Sheet2!$A$2:$A$5,0)-1,)
As in the previous case, you need to activate the Camera feature of Cxcel:
Click the Office button.
Click on the "Excel Options".
Select the "Customize" menu.
In the " Choose commands in the following categories :" menu and select " Commands not present in the Ribbon ".
:" menu and select " ". Search for "Camera" from the dropdown menu and select the line
Click on "Add" button appears in the right column
Click on OK
The camera is now available from the Quick Access toolbar.
Activate a cell in Sheet2 (one containing a photo)
Click on the camera icon on the Quick Access toolbar
Back to Sheet1 and draw the field that will display photos
Without disabling the field, in the formula bar enter =Photo_Bis (the name that was given to the field).
Excel 2003 and earlier.
You may proceed in the same way, or simply copy/paste a photo from Sheet 2 to sheet 3 to create a field, while the photo is active (Insert/Name/Define) give a name to field (here named "Photo_Bis") and in the "refers to" field paste this formula:
=OFFSET(Sheet2!$C$2,MATCH(Sheet3!$A$4,Sheet2!$A$2:$A$5,0)-1,)
In the formula bar make reference to the =Photo_Bis field.
Save the file.
Note that: In both cases it is possible to trim the edges of the fields.
Download the sample file: http://cjoinom/12ju/BGkiRK3SnRi.htm